How to Host a Website: Complete Beginner's Guide
Learn how to host a website step-by-step. Covers web hosting basics, costs, self-hosting options, and why professional hosting is better than DIY solutions.
ASALogsAgency Team
Author
Want to learn how to host a website but worried it requires advanced technical skills? You're not alone. Many beginners believe website hosting is complicated and requires programming knowledge. The truth? Hosting a website can be as simple as creating a Facebook account—if you choose the right approach.
This comprehensive guide will walk you through everything you need to know about website hosting, from understanding what it means to choosing the best hosting service. Whether you're launching a blog, business site, or online store, you'll learn exactly how to get your website online without any technical expertise.
What Does Hosting a Website Mean?
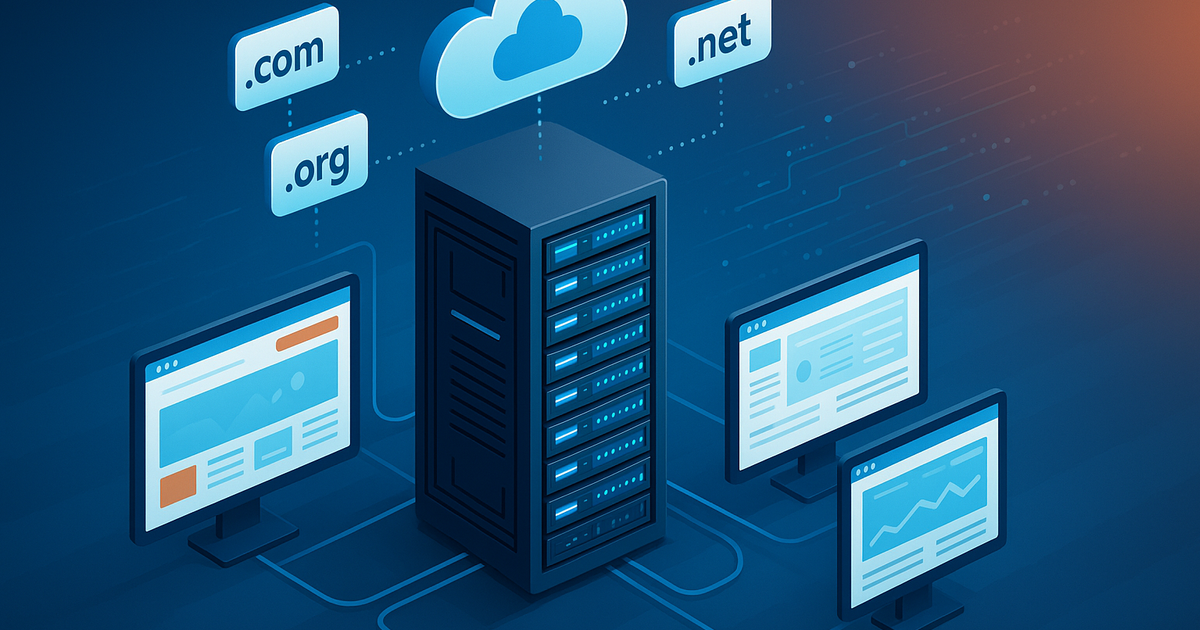
Website hosting means storing your website files on a special computer called a server. This server allows users worldwide to access your website through the internet 24/7.
How Website Hosting Works:
- Your website files (HTML, images, videos, databases) are stored on a server
- The server is a powerful computer that runs continuously
- Web server software (like Apache or Nginx) manages incoming requests
- When users visit your site, the server sends your web pages to their browsers
- Your website appears on their screen
Think of it like this: If your website is a store, hosting is the physical building where that store operates. Without hosting, your website has nowhere to "live" on the internet.
Who Provides Hosting Services?
Thousands of companies specialize in web hosting at affordable prices. Even tech giants use third-party hosting:
- •Netflix uses Amazon Web Services (AWS)
- •PayPal uses Google Cloud Platform
- •Spotify uses Google Cloud and AWS
Only massive companies like Google, Microsoft, and Amazon host entirely on their own infrastructure because they have the technical expertise and financial resources. Everyone else—including Fortune 500 companies—uses professional web hosting providers.
Bottom Line: You don't need to build or maintain servers yourself. Professional hosting companies handle all technical aspects while providing easy-to-use tools for managing your website.
What You Need to Host a Website
To get your website online, you need just two essential components:
1. Web Hosting Service
A web hosting provider gives you:
- •Server space to store your website files
- •Bandwidth for visitors to access your site
- •Technical maintenance (security, updates, backups)
- •Easy management tools (control panels, one-click installers)
- •Customer support when you need help
Popular Hosting Providers:
- •Bluehost
- •SiteGround
- •HostGator
- •DreamHost
- •A2 Hosting
2. Domain Name
A domain name is your website's address that users type into their browsers.
Examples:
- •
YourBusiness.com - •
MyBlog.net - •
OnlineStore.org
Why You Need a Domain:
Without a domain, users would need to type your server's IP address (like 64.233.160.1) to visit your site. Domain names provide a human-friendly way to connect browsers to your web server.
Domain Registration:
- •Register through domain registrars (GoDaddy, Namecheap, Google Domains)
- •Or get a free domain with many hosting plans
- •Costs typically $10-15 per year
Types of Web Hosting Services
Different websites have different needs. Here are the main hosting types:
1. Shared Hosting (Best for Beginners)
What it is: Your website shares server resources with other websites.
Pros:
- •✅ Most affordable ($3-10/month)
- •✅ Easy to use with control panels
- •✅ No technical knowledge required
- •✅ Perfect for small to medium websites
Cons:
- •❌ Limited resources
- •❌ Performance affected by other sites
- •❌ Less control over server settings
Best for: Blogs, small business sites, portfolios, new websites
2. VPS Hosting (Virtual Private Server)
What it is: You get a dedicated portion of a server with guaranteed resources.
Pros:
- •✅ More resources than shared hosting
- •✅ Better performance and reliability
- •✅ More control and customization
- •✅ Scalable as your site grows
Cons:
- •❌ More expensive ($20-80/month)
- •❌ Requires some technical knowledge
- •❌ You manage more aspects yourself
Best for: Growing websites, online stores, high-traffic blogs
3. Dedicated Hosting
What it is: You rent an entire physical server exclusively for your website.
Pros:
- •✅ Maximum resources and performance
- •✅ Complete control over server
- •✅ Highest security and reliability
- •✅ Can handle massive traffic
Cons:
- •❌ Very expensive ($80-500+/month)
- •❌ Requires technical expertise
- •❌ You're responsible for maintenance
Best for: Large enterprises, high-traffic sites, applications with special requirements
4. Cloud Hosting
What it is: Your website runs across multiple connected servers in the cloud.
Pros:
- •✅ Excellent uptime and reliability
- •✅ Easily scalable resources
- •✅ Pay only for what you use
- •✅ Handles traffic spikes well
Cons:
- •❌ Variable pricing can be unpredictable
- •❌ Can become expensive with high traffic
- •❌ More complex to manage
Best for: Sites with fluctuating traffic, growing businesses, applications
5. Managed WordPress Hosting
What it is: Specialized hosting optimized specifically for WordPress sites.
Pros:
- •✅ WordPress-specific optimizations
- •✅ Automatic updates and backups
- •✅ Expert WordPress support
- •✅ Enhanced security for WordPress
- •✅ Better performance
Cons:
- •❌ More expensive than shared hosting
- •❌ Only works for WordPress sites
- •❌ Some restrictions on plugins/themes
Best for: Serious WordPress users, businesses, high-traffic WordPress blogs
Choosing the Right Hosting Plan
Questions to Ask Yourself:
1. What type of website are you building?
- •Personal blog → Shared hosting
- •Business website → Shared or VPS hosting
- •E-commerce store → VPS or managed WordPress hosting
- •High-traffic site → Cloud or dedicated hosting
2. What's your technical skill level?
- •Beginner → Shared or managed hosting (user-friendly)
- •Intermediate → VPS hosting (more control)
- •Advanced → Dedicated or cloud hosting (full control)
3. What's your budget?
- •Tight budget → Shared hosting ($3-10/month)
- •Moderate → VPS or managed hosting ($20-80/month)
- •Large budget → Dedicated or enterprise cloud ($100+/month)
4. How much traffic do you expect?
- •Under 10,000 visitors/month → Shared hosting
- •10,000-100,000 visitors/month → VPS hosting
- •100,000+ visitors/month → Cloud or dedicated hosting
Beginner Recommendation:
Start with shared hosting. It's affordable, easy to use, and sufficient for 95% of new websites. As your site grows, you can easily upgrade to more powerful hosting.
How Much Does Website Hosting Cost?
Let's break down the actual costs of hosting a website:
Hosting Service Costs:
Shared Hosting: $3-10/month
- •Often includes free domain for first year
- •Free SSL certificate included
- •Best value for beginners
VPS Hosting: $20-80/month
- •More resources and control
- •Better for growing sites
Dedicated Hosting: $80-500+/month
- •Enterprise-level resources
- •For high-traffic sites only
Managed WordPress Hosting: $15-100/month
- •WordPress-optimized performance
- •Premium support included
Additional Costs to Consider:
Domain Name: $10-15/year
- •Sometimes free with hosting plans
- •Premium domains cost more
SSL Certificate: $0-100/year
- •Free with most modern hosting plans
- •Essential for security and SEO
Website Theme/Template: $0-200 one-time
- •Free options available
- •Premium themes offer more features
Plugins/Extensions: $0-500/year
- •Many free options available
- •Premium plugins add functionality
Email Hosting: $0-10/month
- •Some hosting plans include it
- •Professional email like you@yourdomain.com
Realistic Budget for Beginners:
Minimal Setup: $50-100 first year
- •Shared hosting plan
- •Free domain included
- •Free theme and plugins
- •Free SSL certificate
Professional Setup: $200-500 first year
- •Better hosting plan
- •Premium theme
- •Essential premium plugins
- •Professional email
Pro Tip: Use free tools whenever possible and only pay for what you truly need. Upgrade as your website grows and generates revenue.
Can You Host a Website on Your Own Computer?
Short answer: Yes, technically you can. Should you? No, and here's why.
What is Self-Hosting on Your Computer?
Self-hosting means running web server software on your personal computer to host your website. This is useful for local development and testing but not recommended for live websites.
Setting Up a Local Server (For Testing Only)
Many developers use local servers to test websites before going live. Here's how it works:
What is WAMP?
WAMP is software that creates a website running environment on Windows by packaging:
- •Apache – Web server software
- •MySQL – Database management
- •PHP – Programming language
Installation Steps:
- Download WAMP from the official website
- Choose 32-bit or 64-bit based on your system
- Install and launch WAMP
- Your local server is ready at
localhost
For Mac Users: Use MAMP instead (Mac, Apache, MySQL, PHP)
For Linux Users: Use LAMP (Linux, Apache, MySQL, PHP)
Accessing Your Local Website:
Once installed, you can:
- •Create websites at
C:\wamp\www\(Windows) or/Applications/MAMP/htdocs(Mac) - •Access them at
http://localhostin your browser - •Test WordPress installations
- •Learn web development safely
Making Your Local Website Public (Not Recommended)
Some adventurous users ask how to make their home-hosted website accessible online. Here's how—but we strongly advise against it.
Required Steps:
1. Configure Web Server:
Find and edit the httpd.conf configuration file:
- •WAMP:
C:\wamp\bin\apache\apache[version]\conf\ - •MAMP:
/Applications/MAMP/conf/apache/
2. Change Listen Address:
Find: Listen 80
Replace with: Listen YOUR_IP:80
Find your IP by searching "what is my IP" on Google.
3. Set Server Name:
Find: ServerName localhost:80
Replace with: ServerName YOUR_IP
4. Allow External Access:
Find the directory configuration and change permissions to:
Order Allow, Deny Allow from all
5. Restart Server
6. Configure Router Port Forwarding:
If behind a router:
- •Access router settings (usually at
192.168.1.1) - •Enable port forwarding for port 80
- •Forward to your computer's local IP address
7. Point Your Domain:
Edit DNS settings at your domain registrar:
- •Add an A record
- •Point to your public IP address
Why You Should NOT Host on Your Own Computer
Major Disadvantages:
1. 24/7 Uptime Required
- •Your computer must run continuously
- •Any shutdown means your website goes offline
- •Power outages break your site
- •Leads to enormous electricity costs
2. Security Nightmares
- •Your home network becomes vulnerable to attacks
- •Hackers can exploit server vulnerabilities
- •Virus and malware risks increase dramatically
- •Other devices on your network are at risk
- •DDoS attacks can overwhelm your connection
3. Technical Maintenance Burden
- •Manually install security updates
- •Configure and maintain backups
- •Monitor server performance
- •Fix issues yourself 24/7
- •Requires significant technical expertise
4. Performance Issues
- •Home internet upload speeds are slow
- •Limited bandwidth affects visitors
- •Can't handle traffic spikes
- •No CDN or caching optimizations
5. Additional Costs
- •Static IP address: $10-30/month extra from ISP
- •Increased electricity: $50-100/month
- •Upgraded internet: Faster upload speeds needed
- •Hardware replacement: Server wear and tear
6. Legal and ISP Restrictions
- •Many ISPs prohibit hosting in terms of service
- •Residential plans not designed for hosting
- •Port 80 may be blocked by ISP
- •Could violate local regulations
7. No Professional Support
- •No customer support when things break
- •You're responsible for all troubleshooting
- •Downtime directly impacts your business
Cost Comparison:
Self-Hosting on Computer:
- •Static IP: $15/month
- •Increased electricity: $75/month
- •Hardware: $50/month (depreciation)
- •Total: $140/month + countless hours of work
Professional Shared Hosting:
- •Reliable hosting: $5/month
- •Professional support included
- •No maintenance required
- •Total: $5/month + zero hassle
Verdict: Professional hosting is cheaper, more reliable, more secure, and infinitely less stressful than self-hosting.
Recommended: Use Professional Hosting
Step-by-Step: Getting Started with Hosting
Step 1: Choose a Hosting Provider
Research and select based on:
- •Customer reviews
- •Uptime guarantees (99.9%+)
- •Customer support quality
- •Pricing and refund policy
Top Beginner Recommendations:
- •Bluehost – Official WordPress recommendation
- •SiteGround – Excellent support and performance
- •HostGator – Affordable with good features
- •DreamHost – Great for WordPress sites
Step 2: Select a Hosting Plan
Start with the basic shared hosting plan:
- •Sufficient for new websites
- •Can upgrade later as needed
- •Usually includes free domain
- •Free SSL certificate included
Step 3: Register Your Domain
Choose a memorable domain name:
- •Keep it short and brandable
- •Use
.comif possible - •Avoid numbers and hyphens
- •Check trademark conflicts
Step 4: Set Up Your Hosting Account
Complete the setup process:
- •Fill in registration details
- •Choose billing cycle (annual often saves money)
- •Select optional add-ons (often unnecessary)
- •Complete payment
Step 5: Install Your Website
Most hosts offer one-click installers for:
- •WordPress
- •Joomla
- •Drupal
- •HTML websites
Step 6: Configure Your Website
- •Install a theme
- •Add essential plugins
- •Create initial content
- •Configure settings
- •Test functionality
Step 7: Launch Your Website
- •Remove "coming soon" page
- •Submit to search engines
- •Share on social media
- •Start promoting
Best Practices for Website Hosting
Security:
- •✅ Keep software updated
- •✅ Use strong passwords
- •✅ Enable automatic backups
- •✅ Install security plugins
- •✅ Use SSL certificates (HTTPS)
Performance:
- •✅ Choose quality hosting
- •✅ Use caching plugins
- •✅ Optimize images
- •✅ Use a CDN for global reach
- •✅ Monitor site speed regularly
Maintenance:
- •✅ Back up regularly (daily or weekly)
- •✅ Monitor uptime
- •✅ Review analytics monthly
- •✅ Update content regularly
- •✅ Test site functionality
Scaling:
- •✅ Start small with shared hosting
- •✅ Monitor traffic and performance
- •✅ Upgrade when needed (not before)
- •✅ Consider managed hosting for WordPress
- •✅ Use cloud hosting for traffic spikes
Conclusion
Hosting a website is much simpler than most beginners imagine. By choosing professional web hosting instead of self-hosting, you get:
✅ Reliability – 99.9%+ uptime guaranteed
✅ Security – Professional protection and monitoring
✅ Support – Expert help when you need it
✅ Performance – Optimized servers and infrastructure
✅ Affordability – Starting at just $3-10/month
✅ Simplicity – No technical expertise required
Your Action Plan:
- ✅ Choose a reputable hosting provider
- ✅ Select an appropriate hosting plan (start with shared hosting)
- ✅ Register your domain name
- ✅ Install your website (WordPress recommended for beginners)
- ✅ Configure basic settings and security
- ✅ Create content and launch
Final Recommendation: Never host your live website on your personal computer. Use local servers like WAMP/MAMP for testing and learning, but always use professional hosting for your actual website. The small monthly cost is worth the reliability, security, and peace of mind.
Ready to host your website? Choose a hosting provider today and get your site online in minutes—no technical skills required!
Related Topics
Written by ASALogsAgency Team
Expert content creator specializing in technology, AI, and digital innovation. Passionate about sharing insights that drive business growth and digital transformation.
View all postsJoin the Discussion
Share your thoughts and engage with other readers
Comments section coming soon
![How to Create a Custom Permalink in WordPress [Complete Guide]](https://cdn.sanity.io/images/eeieuy98/production/56a641335b85ad424b31dfc1a005581eaf29d429-1536x1024.png?rect=0,128,1536,768&w=400&h=200)